Showing posts with label How to. Show all posts

Monday, July 15, 2013

How to Make a Single Serving Cup From Homemade Ice Cream. [a picture tutorial]


Who can resist a scoop of homemade ice cream? Not I. In fact, every time I have made salted caramel ice cream in the past, I had the hardest time stopping. Recently, I discovered a delicious strawberry ice cream recipe that I absolutely adore. To make it, follow the directions to make vanilla ice cream, but omit the vanilla bean. Take 1 lb of fresh strawberries and slice and dice into tiny pieces. Add 1/4 cup of granulated sugar (or more/less depending on how sweet the strawberries are), mix, and let it sit overnight in the fridge with the vanilla custard base. The next day, mash the strawberries with a potato masher until it's at the desired consistency. I don't like using the blender, because I enjoy my strawberry ice cream with texture. Mix the strawberries into the vanilla custard and freeze in ice cream maker.

Whenever I go to the grocery store, I have a tendency to purchase single serving ice cream flavors. I pondered and wondered if there was a way to make one portion sizes with homemade ice cream. With my stubborn ass, I figured out a way and you can follow along in this picture tutorial.

Materials: saran wrap, plastic hair ties, 2oz plastic sample/portion cups (aka jello shot cups)

Pour freshly churned ice cream into all the containers and leave in freezer while you attach the cover. First, Take saran wrap and place over top of container. Secondly, take a hair tie and stretch it over the opening.

Viola! A perfectly sealed container.

When you are ready to enjoy ice cream, simply peel off the saran wrap like the covering for the store brought ones.

Mmmm...enjoying my sweet treat.

Monday, August 8, 2011

How to cut pasta by hand (a step-by-step picture tutorial)

My favorite time of the year is August when the big back-to-school sale occurs. I love that $1 can buy me an insane amount of supplies. I have bought notebooks, filler paper, and folders for 1 cent. Today I managed to purchase two glue sticks and one 4 oz. school glue for 50 cents.

When I was in elementary school, my parents didn't buy me over priced Crayola or Lisa Franks school supplies.  Instead, I used off brands that worked just as well and I learned that you don't always need the name brand. As a result, I feel strongly about improvising to get the job done instead of buying tools for every single task.

Since I don't make pasta that frequently, I never purchased a pasta machine. When it comes to cutting the pasta, it's a painstaking task that takes between 30 minutes and an hour depending on the batch. I use a knife to cut so the dough bunches up, tears, and gets stretched out. 

One day when I was ripping paper by creasing the edges, I thought, why can't I do that with the pasta? The technique I'm about to show you is all about creasing and ripping so the process is faster and more efficient  with minimal effort and time.

Roll out the dough.

Using the edge of a pastry scraper, put pressure into the pasta dough and slide/drag the pastry scraper down to create a line in the dough. It doesn't need to go all the way through the dough.

When you have finished "drawing" lines, gently pull the noodle away from the rest of the dough. It should break away easily -- like tearing paper with a perforated edge. 

Whoo. The batch of completed noodles.

Sunday, June 5, 2011

How to pit Cherries with a Chopstick and Knife (step-by-step picture tutorial)

It's the season where all the wonderful sweet cherries flood the markets. It's also the time where cherry desserts are popular and cherries need to be pitted. Before I came up with this technique, I used to halve cherries and dig pits out with my fingers. Not so pretty, but it worked.

Sometime last year, I remembered reading about using a chopstick to pit a cherry. I tried it once and the cherry was mangled with juice leaking everywhere. I figured that there had to be an easier way and I came up with this method. All you need is a chopstick, knife, plate, and cherries.

Note: I recommend "X-ing" all the cherries first then pushing them out with the chopstick to make the process go faster.

Mmm. The finished bowl of cherries.

Gather your tools: a blunt tip chopstick, knife, and plate. Don't forget your cherries!

Muahhaha. The victim: a ripe cherry.

Make a "X" with your knife on the bottom of the cherry. (NOTE: Watch your fingers! I almost nicked myself a couple of times.)

When you make your "X," make sure the incision goes all the way down to the pit.

Grip the cherry like so. Hold it firmly.

With the chopsticks, give a firm push through the top (where the stem used to be).

The pit should pop right out with minimal juice and flesh loss.

Sometimes pits have a hard time coming out so you'll need to help it along by digging  from the bottom.
X marks the spot!

Done~ Enjoy your bowl of cherries!

Tuesday, May 10, 2011

The reason for why I go to baseball games. [How to make Roasted Garlic]

Garlic is my best friend. I love it in chunks, minced, whole, and even dried. Who cares?! Let me have garlic breath. I remember the first time I went to a baseball game with my dad and sisters and I didn't care much for the game. The best part of the day was when he took me to the $5 garlic fries booth and I was sold to the garlic devil. From that moment on, my favorite part of going to the ballpark was buying garlic fries not rooting for my team. Team spirit fail.

Then one day when I was out with my boyfriend for happy hour, I stumbled into another delicious garlic concoction that has been missing from my life: roasted garlic. Wow. Roasted garlic smeared onto a crispy baguette is simply divine. After I finished my happy hour snack, I promised myself that I needed to make some for myself in the future.

Roasted Garlic

Roasted Garlic

Note: I know most recipes ask you to take a whole garlic bulb, hack off the top, drizzle it with oil, wrap it in foil, and then dump it in the oven. However, I didn't want to use a whole bulb, which is why I suggested the use of garlic cloves. 

Ingredients
garlic
olive oil
salt, optional

Directions

  1. Preheat oven to 400°F.
  2. Take garlic cloves and cut off the top or bottom end. 
  3. Take a sheet of foil, put the cloves in the middle, and coat it in olive oil. 
  4. Wrap the garlic and pop it in the oven for 30 to 45 minutes. [To save on my electric bill, I often bake this along with roasted vegetables.]
  5. Carefully unwrap the package and squeeze the roasted garlic out of the papery skin. It should slip right out. If desired, sprinkle it with salt.

Wednesday, April 20, 2011

How to Make Croutons

For reasons unknown, my ability to brainstorm by pen and paper is depressing. I sit at my desk or on the bus and I struggle to formulate my thoughts and sentences. The more effort I put into trying to construct ideas, the more tired I feel. Eventually, I fall asleep.

On the other hand, shove me on a seat in front of the computer, then miraculously my fingers move on its own. No guidance necessary. They effortlessly find their places on the keyboard and dance across until I have typed out all my ideas. Does this happen to anyone else?

My theory is that since I grew up in the computer age, I have trained my brain and hands to work efficiently as a pair when I'm typing thoughts out versus when I write with pen and paper. Because of this weakness, I have always done below average on standardized exams if they have an essay portion. My ability to spell words correctly without spell check is embarrassing. Ugh. This technology age is killing my intelligence. In an attempt to regain some brain cells, I've been reading more and writing in a notebook when I'm traveling.


Luckily for me, making croutons does not require intelligence. All you need is decent hand-and-eye coordination to cut bread into cubes and the ability to read the temperature on the oven in order to create a light crunchy delight.


Note: I enjoy croutons unseasoned and in tiny cubes. Feel free to add herbs or salt to amp up the flavor or making larger sized croutons. With larger sized croutons, you may need to leave the croutons in the oven longer. 

My favorite bread to use is sourdough.

Croutons

Servings: unlimited

Ingredients
Bread, cut into small cubes (approx. 0.5 inch)

Bread knife
Foil/baking sheet

Directions
  1. Preheat oven to 300°F.
  2. Use a bread knife to cut the bread into cubes, approximately 0.5 inches. Cut off the crust if it's a crusty bread like french bread.
  3. Place the cubes on a baking sheet or foil in one layer. Let it bake in the oven for 11 to 15 minutes, depending how brown you like your croutons. 

Thursday, March 25, 2010

How to...open a durian with your hands.


What is a durian?

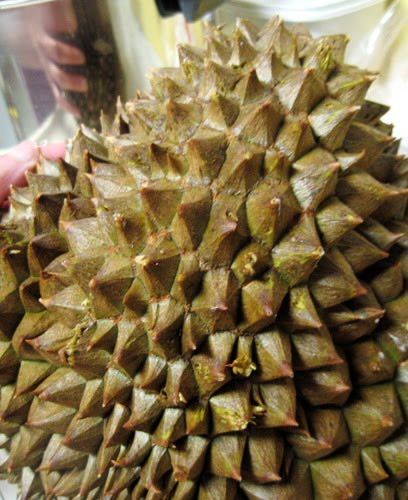
Durian.

A durian has a hard outer shell with many sharp spikes and have approximately 5 pods per fruit that's filled with 1 to 3 seeds per pod. A soft, creamy, and sweet flesh surrounds the brown seed. The durian is known for its distinct scent. To the fans, the durian has a sweet fragrant aroma, but to the unfamiliar, it has the scent of a gas leak.
Some are taught to open a durian with a knife, but a knife isn't necessary.

All you need are your handy dandy fingers. Before I begin, here are some important notes:

  • The riper the durian, the easier to open.
  • This method takes practice to perfect.
  • Good luck and have fun =)


Note: I apologize for the poor quality of the photos. Knowing me, I will probably update the photos when we get another durian.

Can you find the line?

First, take a good look at the durian.
Select a pod and look for the spikes that are going in opposite directions.

Aha! Open sesame!

You have found the "secret" opening.

Oooh yeaaaah. Let me see your insides.

Pull on the area and you'll find the durian slowly opening up.

Mmmmm. Yums.

Spoon out the flesh.

Enjoy~

Monday, February 1, 2010

Don't want to spend money on a pastry brush? Try this!

 
Fresh Buns!

I'm sure these buns look familiar. I talked about them in my last post. However, I wanted to share something new with my readers (if I even have any) hahaha. I guess, in reality, all this writing is for me.

What I wanted to share was that you don't need a pastry/food brush to paint the egg wash on the buns. You won't believe the tool. I guarantee that every single person has this in their home. You ready?

It's...paper napkins! (or paper towels if your napkins aren't heavy duty)

Dip the napkin in the egg wash and brush it over 
the bun like a normal brush.

Spread a thin layer all over the top.

And ta-da! You've accomplished the task without having to buy a new tool.

Saturday, January 2, 2010

Don't own a grater? Not a problem!

My mom and dad were never interested in baking or cooking. Cooking was a necessity not a hobby. As a result, our kitchen lacks proper utensils such as graters, rolling pins, and zesters.

Starting September of 2008 when baking and cooking became my hobby, I had to improvise when recipes called for certain tools or ingredients. For example, I used a knife to "shave" the zest off of lemons for my Lemon Souffle Pudding. Another time, I needed to flatten some bread dough. I ended up using a high ball glass to roll out the dough.

Well, this time around, I needed to grate chocolate for a tiramisu. With no grater in sight, my handy dandy paring knife was my savior. This baby can zest citrus, peel fruits, and grate chocolate. Well...not "grate," but it can shave chocolate pretty well!

Mmmm...A pile of chocolate.

By holding the chocolate bar at an angle, you can shave slivers of chocolate with a knife, resulting in some fine chocolate that you can sprinkle on top of your goodies. I'm not going to lie, shaving your chocolate with a knife is a pain, but it works.


See...it works!

Sunday, October 25, 2009

How to Peel Garlic

Crushed Garlic.

You can easily peel a garlic's outer layer of skin by crushing it with a knife. Ta-da!

*I know, lame post....*

LinkWithin

Related Posts with Thumbnails