Tuesday, March 29, 2011

Soft Fluffy Pretzels

Cinnamon Sugar Pretzel Sticks

My favorite part about baking goodies or feeding loved ones is creating something they truly enjoy. If they don't, I'll improve it and customize it to their taste. For example, I know JSB loves cinnamon and sugar topping, but only if I use granulated sugar. However, my mum and I prefer the crunch from turbinado sugar.When I make baked goods, I make sure to have some with granulated and others with turbinado to satisfy both of my favorite people. =D

Fluffy!~

Luckily, this recipe is easily customizable so that I can also make my boyfriend happy. He could careless for cinnamon & sugar, but he'll go bonkers for chocolate chips. I know he loves pretzels so I decided to make some chocolate chip ones for him too!  I didn't think chocolate chips pretzels would taste that great, but the flavor floored me. The chocolate stayed gooey even after it cooled down. Gosh darn, it was great.

This recipe is one my favorites, because you can easily add flavors and the result is a soft chewy pretzel. What more can I ask for? And if you don't want a full pretzel, cut it into 1 inch pretzel bites or 3 inch sticks. They're great for parties. You have salted or plain ones to dip in mustard or make some cinnamon-sugar coated ones for the those that have a sweet tooth. Heck, add in some chocolate chip pretzels and the guests will die from happiness or raisins for the health conscious...See, there are so many possibilities.


Soft Pretzels
adapted from SugarLaw

Ingredients
1 tsp active dry yeast
pinch of sugar
1/3 cup warm water
1 1/4 cups all-purpose flour
2 TBSP white sugar
1/2 tsp salt
1 TBSP canola oil

3 TBSP baking soda
3 cups hot water

Directions:
  1. Dissolve yeast in water and pinch of sugar for 10 minutes.
  2. Mix yeast mixture with flour, sugar, salt, and canola oil. Knead until combined, a few minutes. (TOPPING NOTE: If adding raisins or chocolate chips, add in a hand full and knead it into dough)
  3. Let the dough rise in a greased bowl until doubled in size, approximately 1 hour.
  4. Preheat oven to 425°F.
  5. When dough has risen, pinch into 6 portions and roll into a long strand. Twist into pretzel shape or cut into 1 or 3 inch sized pieces.
  6. Dissolve baking soda in boiling water. Stir baking soda until dissolved. Dip Pretzel in mixture for 15 seconds. Sprinkle pretzels with sea salt or cinnamon sugar. 
  7. Bake for 8 minutes until browned.

Thursday, March 24, 2011

Magic Coffee

When you work with children, you're bound to get sick every couple of months. I thought I had a strong immune system, but man, the germs that kids carry are devastating. I either feel off for a couple of weeks or I get hit hard suddenly...and sometimes both. To ease my suffering, I've been making ginger milk pudding, because the warm dessert and ginger soothes my throat and kills my craving for sweets in a fairly healthy way.

On days where I'm not sick, I enjoy a cold-brewed cup of magical coffee. I'm so glad I stumbled onto this recipe, because the cinnamon surprisingly compliments coffee quite well. For me, that's the "magic" aspect of it.

Non-fat milk sinks to the bottom of the glass. Not photogenic at all.

Magical Coffee
adapted from Food52 by ErinH

Servings: 1 Glass

Ingredients
2 1/2 TBSP of coarsely ground coffee
3/4 cup of water
1/2 tsp of cinnamon
3/4 TBSP of sugar

Directions
  1. Add all ingredients in a container. Stir until sugar has dissolved.
  2. Let it sit in fridge over night and filter/strain the next morning.
  3. Add ice (if desired) and milk.

DIY coffee strainer.

Sunday, March 20, 2011

My Mom

Chocolate chip cookies. The first time I saw them baked at home was when I was in elementary school. Back then, baking and cooking seemed so impossibly difficult -- only something my mum could accomplish. She used to bake chocolate chip cookies, white chocolate and macadamnia nut cookies, crossients, and biscuits. I thought she was the coolest mom EVER even though the goodies were premade dough from Pillsbury and Mrs. Fields (the cookie dough balls were so large that she halved them prior to baking).

Eventually she upgraded to baking goodies from scratch. I vaguely remember her baking a pumpkin pie. She also made several cheesecakes. Of course she cheated along the way by using premade pie crusts and tried to make it healthier by reducing the sugar and using reduced fat cream cheese. One time she wanted to make a chocolate cheesecake so she melted some chocolate only to discover that she used unsweetened chocolate so it was horrendously bitter. I remember she tried fixing it by added sugar. No matter how much sugar was incorporated, it still wasn't palatable. She ended up swirling it into a plain cheesecake and tossing the rest of the chocolate. But as a deprived child that rarely ate sweets, it was the PRETTIEST and BEST cheesecake ever. My mom made oatmeal cookies, but it was filled with oats and nuts with very little butter so it was extremely crispy like a granola in cookie form.

She was my mom and in my eyes, anything she made was gold and down right orgasmic. If you asked me now if I would enjoy her premade doughs, cheesecake, and oatmeal cookies, sadly, I probably wouldn't touch it. However, I can't blame her. Baking and cooking isn't a passion for her. It's a means to an end. It's part of her routine to feed her hungry family, because she loves us. There is one dish that she makes that I'll always love and it'll never change: it's jello filled with canned peaches. Omg. Pure joy.

Now on to the chocolate chip recipe that inspired me to write about my mom. This recipe is from America's Test Kitchen. Wow. It was pretty darn delicious. The extra butter seriously had the cookie melting in your mouth. The texture is everything I want in a cookie: crispy around the edges and chewy on the inside.


Chocolate Chips Cookies
from America's Test Kitchen

Ingredients
1 3/4 cups unbleached all-purpose flour (8 3/4 ounces)
1/2 teaspoon baking soda
14 tablespoons unsalted butter (1 3/4 sticks)
1/2 cup granulated sugar (3 1/2 ounces)
3/4 cup packed dark brown sugar (5 1/4 ounces)
1 teaspoon salt
2 teaspoons vanilla extract
1 large egg
1 large egg yolk
1 1/2 cups bittersweet chocolate chips (Ghirardelli recommended)
3/4 cup chopped pecans (optional) or 3/4 cup walnuts, toasted (optional)

Directions
  1. Adjust oven rack to middle position and heat oven to 375 degrees. Line 2 large (18- by 12- inch) baking sheets with parchment paper. Whisk flour and baking soda together in medium bowl; set aside.
    Heat 10 tablespoons butter in 10 inch skillet over medium-high heat until melted, about 2 minutes. Continue cooking, swirling pan constantly until butter is dark golden brown and has nutty aroma, 1 to 3 minutes. Remove skillet from heat and, using heatproof spatula, transfer browned butter to large heatproof bowl. Stir remaining 4 tablespoons butter into hot butter until completely melted.
  2. Add both sugars, salt, and vanilla to bowl with butter and whisk until fully incorporated. Add egg and yolk and whisk until mixture is smooth with no sugar lumps remaining, about 30 seconds. Let mixture stand 3 minutes, then whisk for 30 seconds. Repeat process of resting and whisking 2 more times until mixture is thick, smooth and shiny. Using rubber spatula or wooden spoon, stir in flour mixture until just combined, about 1 minute. Stir in chocolate chips and nuts (if using), giving dough final stir to ensure no flour pockets remain.
  3. Divide dough into 16 portions, each about 3 tablespoons (or use #24 cookie scoop). Arrange 2 inches apart on prepared baking sheets, 8 dough balls per sheet. (Smaller baking sheets can be used, but will require 3 batches.).
  4. Bake cookies 1 tray at a time until cookies are golden brown and still puffy, and edges have begun to set but centers are still soft, 10 to 14 minutes, rotating baking sheet halfway through baking. Transfer baking sheet to wire rack; cool cookies completely before serving.

Saturday, March 12, 2011

Banana Cake (Updated version 3.0)

the frozen raspberries make my cake look sickly.

I'm always coming back to this recipe, because it can be a breakfast bread, a snack, or even a dessert when paired with vanilla ice cream. It's also flexible and forgiving, which means I can experiment and it usually turns out pretty well. I don't think I've ever followed this recipe to the T. It's always evolving and changing. I'm beginning to find combinations that I truly enjoy.

One of my favorite spins was when I added cream cheese filling. Omg, it was divine. Scrumptions. It was perfect. I made it on a Saturday afternoon before I went off to visit my boo. I stayed over at his place and decided that I would take photos on Sunday when I returned home. I returned home to a clear kitchen table. Yes. My lovely JSB and papa devoured the cake, all 3/4ths of it.

This new rendition wasn't loved by my fellow family members as much. I'm unsure of the reason, but my boo and I enjoyed it immensely. I gave him nearly half of the cake. He loved it especially the oomph from the chocolate chips. To me, this version reflects my growth in the kitchen. I'm adding new textures and elevating flavors compared to previous versions. The cinnamon sugar topping gives the cake a nice crunch when you bite into it and the addition of brown sugar and brown butter adds a subtle complexity to the flavor. Hell, I'm even putting more effort into plating, but I don't think my creative eye is working very well as shown in the photos. I'm trying here!

Man, that frozen raspberry is distracting. >.>

Chocolate Chip Cinnamon Banana Cake
Updated from this recipe

Ingredients
3 TBSP of butter
1/4 cup of brown sugar, packed
2 TBSP cinnamon apple sauce
1 tsp of cinnamon
1 egg
dash of milk
2 1/2 bananas, mashed
1 tsp vanilla
3/4 cup flour
scant 1/4 cup of wheat germ
scant 1/4 cup of flax seed
scant 3/4 cup of rolled oats
1 tsp of baking soda
1/4 tsp of salt
a hand full of chocolate chips

Topping:
1 1/2 TBSP of turbinado sugar
1/2 tsp of cinnamon (yes, I LOVE my cinnamon)

Directions
  1. Preheat oven to 350°F.
  2. Heat butter in skillet over medium heat. Swirl the butter occasionally. Wait until the butter turns into a brown shade with a nutty aroma, then turn off the heat.
  3. Add butter to brown sugar. Mix. Add the applesauce, cinnamon, and egg to the mixture. Mix well.
  4. Stir in milk, bananas, and vanilla. Combine.
  5. Add in the rest of the ingredients: flour, wheat germ, flax seed, rolled oats, baking soda, and salt. Mix. 
  6. Gently fold chocolate chips into mixture.
  7. Grease and flour an 8 inch pie/cake pan. Pour mixture in. For topping, combine sugar and cinnamon and evenly distribute it on the surface.
  8. Bake for 20 to 30 minutes or until toothpick comes out clean when the cake is poked.
My attempt at plating with banana ice cream to accompany the cake. Not that pretty, but the ice cream was delish.

Banana Ice Cream

Ingredients
1 frozen banana, slices
1/4 tsp of cinnamon

Directions
  1. Prior to freezing the banana, cut it into slices. 
  2. Put banana and cinnamon in food processor. Start the processor and eventually the banana will reach an ice cream consistency.

Options for flavoring: chocolate shavings, peanut butter, Nutella...the possibilities are endless!

Sunday, March 6, 2011

Apple Juice Stixs

Awhile back, I mentioned that I was frugal in the kitchen. What I'm about to show you next is a tad embarrassing. There should be a limit on frugality, but nope. I know no bounds. In my last post, I posted a recipe on how to make Apple Puffs and I made a side note that one should reserve the juice from the filling. Why? To make these:

Apple Juice Stixs: Appl-ey and cinnamon-ny

Don't give me that look.  Yes, it's not the most gorgeous creation. Yes, it looks rather unappealing, but I am very proud of myself. To create Apple Stix, I guesstimated everything. Did I know what I was doing? Not exactly, but I did have a purpose.

After I made the filling for the apple puffs, I tasted the juice and it was sickly sweet, but I didn't want to waste it. (Case evidence on being frugal #1) I pondered and munched on an apple puff as I tried to come up with a creative solution. A-ha! Candy!! It's so sweet, it would be perfect for candy. I didn't have enough juice to cover the bottom of the pot so I added a bit more sugar and water and started boiling away. I was aiming for the Hard Crack stage (300° - 310°F), but time was working against me. Stupid me thought that I could get the sugar to reach that temperature in 40 minutes. When 40 minutes hit, it was at the soft ball stage, and I didn't have time because I had a meeting to attend. I had two options at this point: it was waste it or let it cool down and see what I created. I opted for the latter.

My  next dilemma. Where and how should I shape the 242°F sugar?? Aiiiyaaah. The only option: parchment paper. Lucky me and my need to keep all things, I had scraps of parchment paper that I stored in a container for moments like these where I didn't need large sheets of parchment paper. (Case evidence on being frugal #2). I carefully poured the mixture into the creased parchment paper and let it cool down.

Check out the texture!

The verdict: it's an extremely soft and chewy candy, because I only managed to get it to the firm ball stage. It definitely works your mouth and it's great for people that like to chew. The taste of the stix was surprisingly pleasant. It had a sweet aroma of apples with a hint of cinnamon.

Apple Juice Stix

Ingredients
leftover juice from apple puffs
sugar
water

Directions
  1. If there isn't much juice left, add more sugar about 1/4 to 1/2 cup and enough water to cover the bottom of the pot.
  2. Boil on medium high until the temperature reaches 245°F. (Next time, I'm going to try reaching the hard crack stage: 300°F to 310°F for a lollipop texture.) Mixture will appear dark brown almost burnt looking, but I assure that it's not.
  3. Pour sugar into creased strips of parchment paper and allow it to cool. If mixture firms up too much during the pouring process, warm it up on the stove until it reaches a pourable consistency.

Wednesday, March 2, 2011

Super Easy Apple Puffs


A pack of puff pastry has been sitting in my fridge since my n3rd party and it was about to expire this month. What's a girl to do when she is OCD about wasting food? Originally, I thought about making chicken pot pie with it, but my family said they didn't want to eat it. I brainstormed some more and decided I wasn't going to make anything for them since they wouldn't appreciate it.

Instead, I came up with some easy peasy snacks to fatten up my teammates at the school I work at. hahahah. [insert evil laugh] For our meeting, I made some cinnamon sugar puffs, which were delicious if you're a fan of sugar, cinnamon, and fat. mmmmmmm. With the rest of the puff pastry, I made simple apple puffs (similar to McDonald's apple pies, but with less fat, sugar, and calories.) Wooohooo~ Dessert without death. A win-win situation. These apple puffs are so easy to put together that a 5-year-old can make it.


Apple Puffs (aka wannabe McDonald's Apple Pies)

Servings: 9 puffs

Ingredients
1 sheet of puff pastry, thawed, cut into 9 squares
1 granny smith apple, diced into small cubes
1 fuji apple, diced into small cubes
2 TBSP brown sugar
1 1/2 TBSP turbinado sugar
1/4 tsp cinnamon

Egg wash: 1 egg + 1 tbsp of water

Directions
  1. Heat apples and sugars over medium heat for 7 - 8 minutes until tender. Mix in cinnamon. Allow to cool to room temperature, approximately 30 minutes. [[NOTE: Reserve juice from filling, because I'll be posting a recipe about what to do with that soon.]]
  2. Preheat oven to 400°F.
  3. Roll puff pastry so that the square increases by 1/3 of it's original size. 
  4. Place 1 tablespoon of apple filling. Pinch edges together and place seam side down on baking sheet lined with parchment paper.
  5. Brush egg wash on top of each puff. Cut 3 slits on top. OPTIONAL: Sprinkle each puff with some turbinado sugar.
  6. Bake for 15 minutes or until golden brown.

Tuesday, March 1, 2011


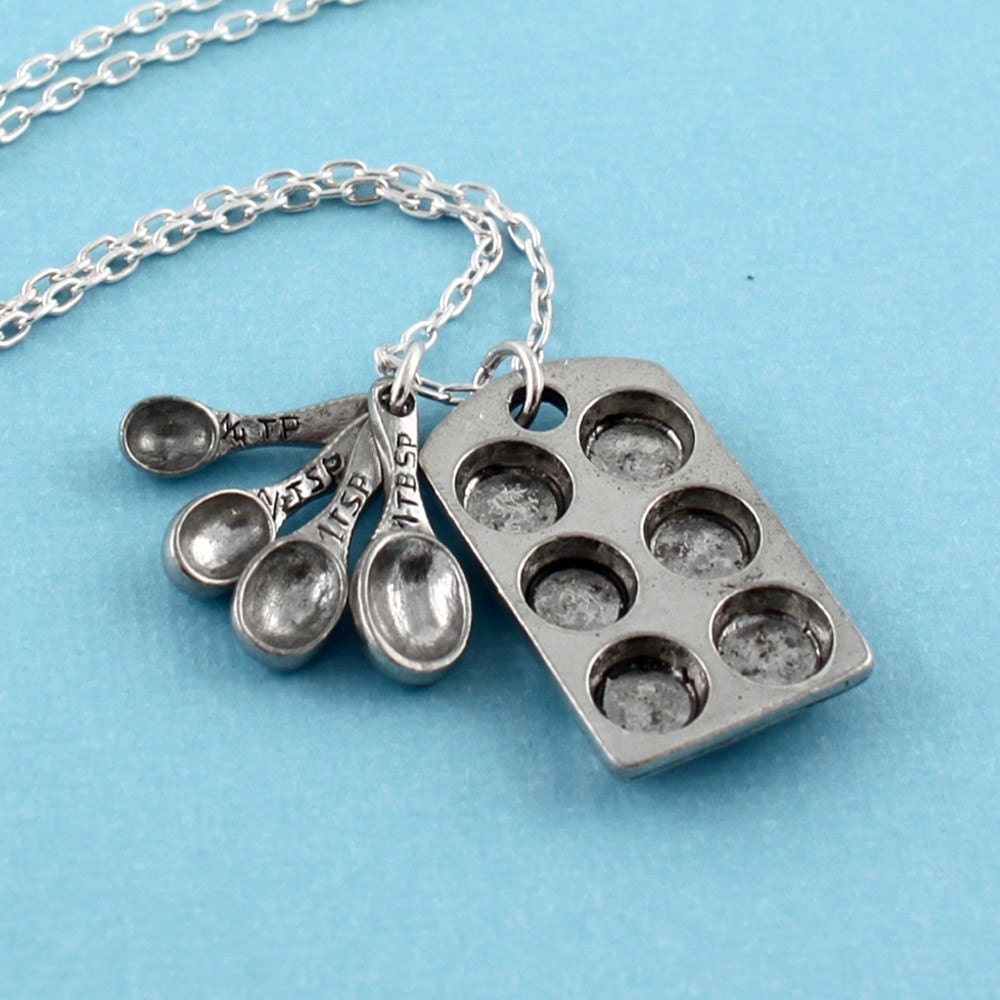
I think I'm in love. This necklace is too cute. The price tag? Only $24!! The seller: LuxeAdornments. Perfect for any baker and I think it's time to add that to my jewerly collection!

huzzah!

LinkWithin

Related Posts with Thumbnails